Configure API Analyze Image
Configure API Gateway for the Analyze Image function
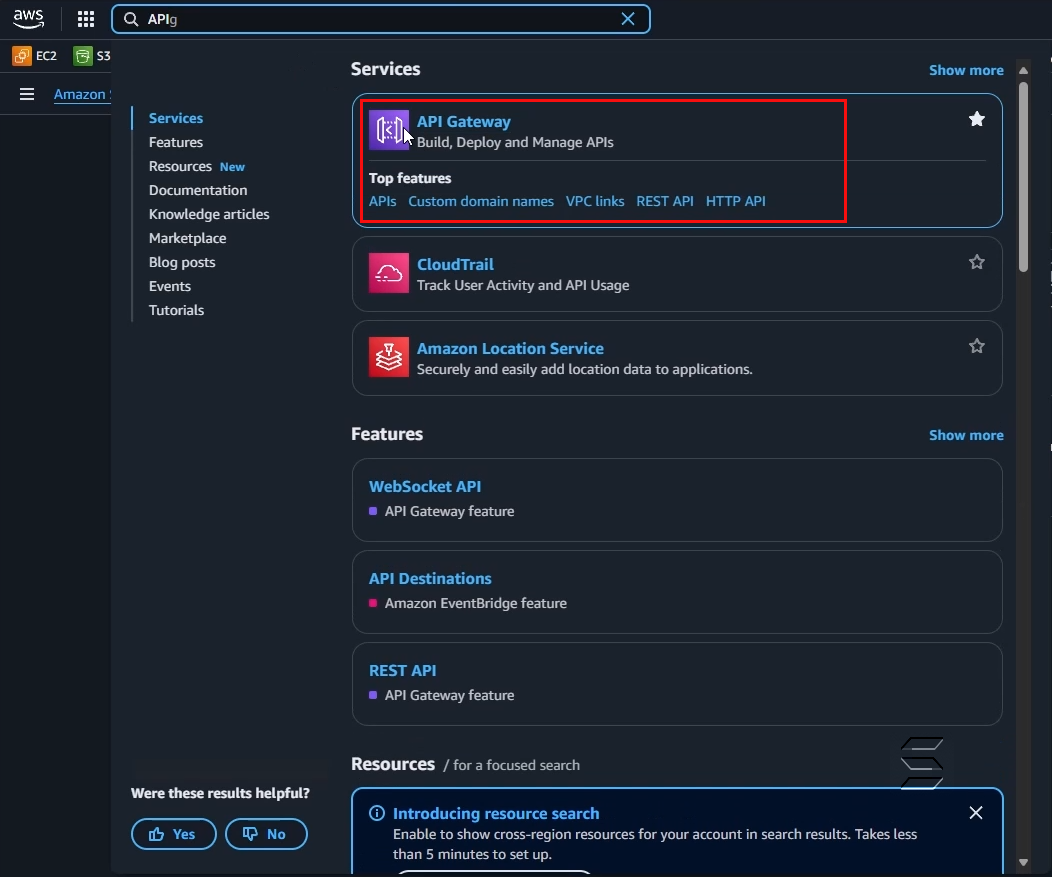
1. Search for and access the API Gateway service page
- In the search bar, enter API Gateway
- The result will be displayed as shown below:
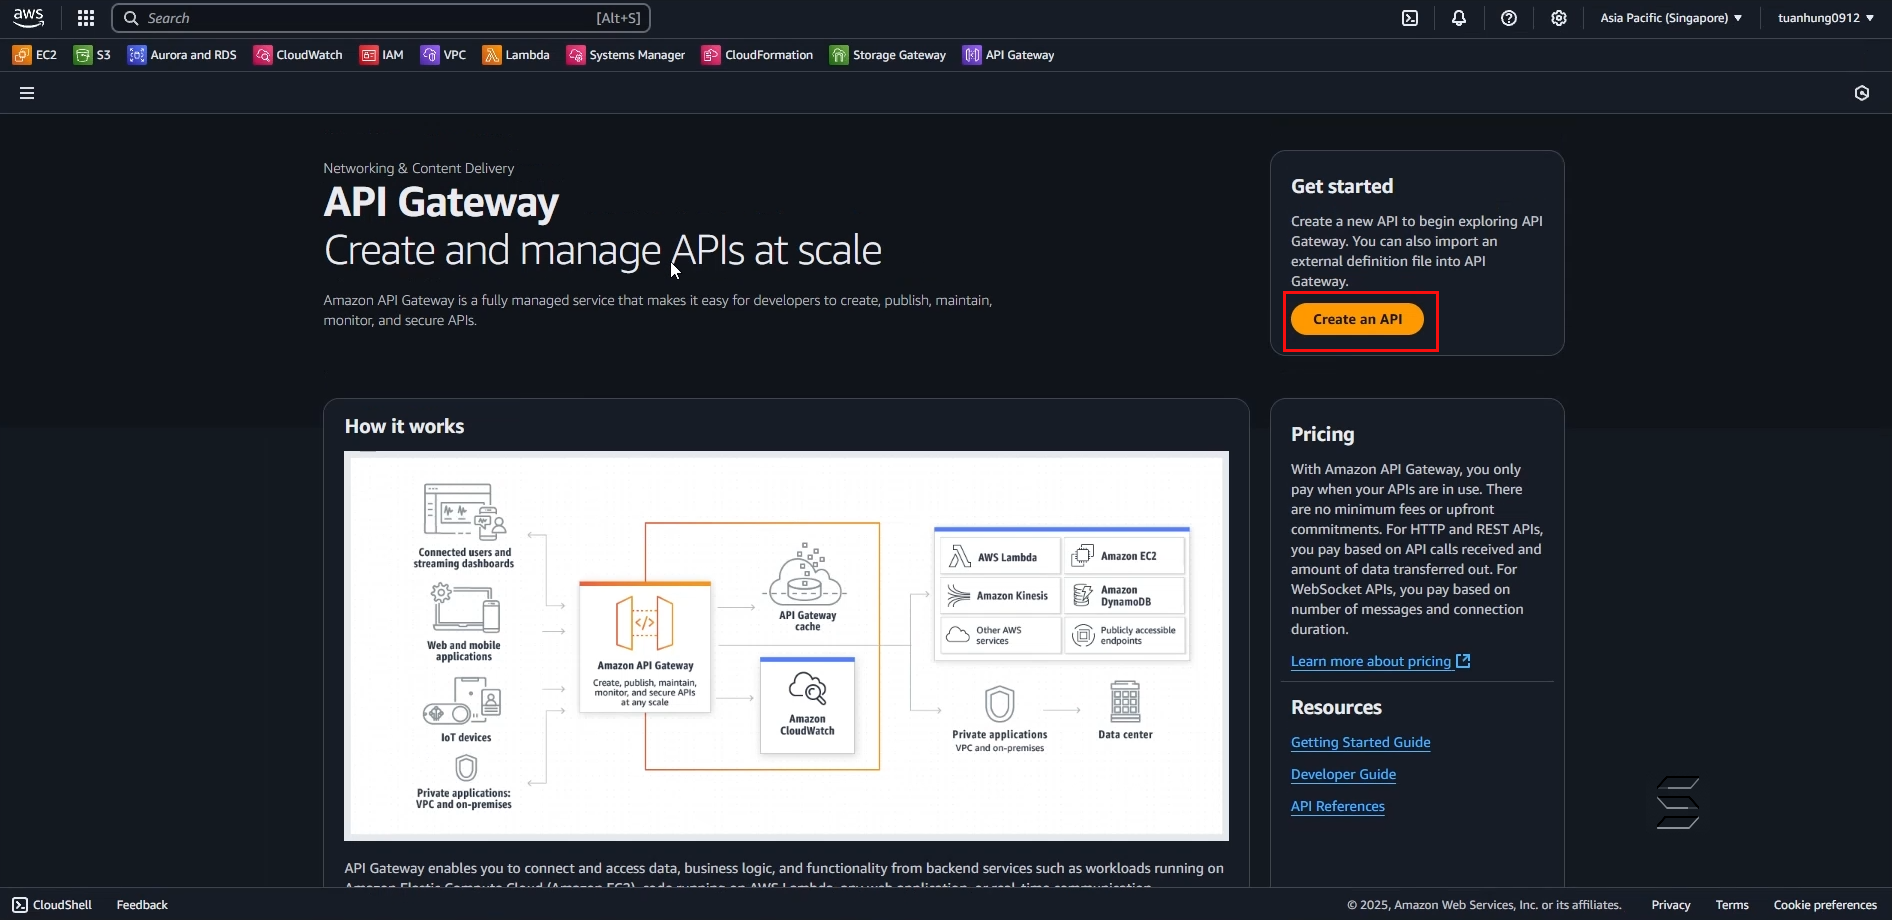
- On the main page of the API Gateway service on AWS, you can create a new API by clicking the Create an API button on the right, as shown below:
2. Configure API Gateway for the Analyze Image function
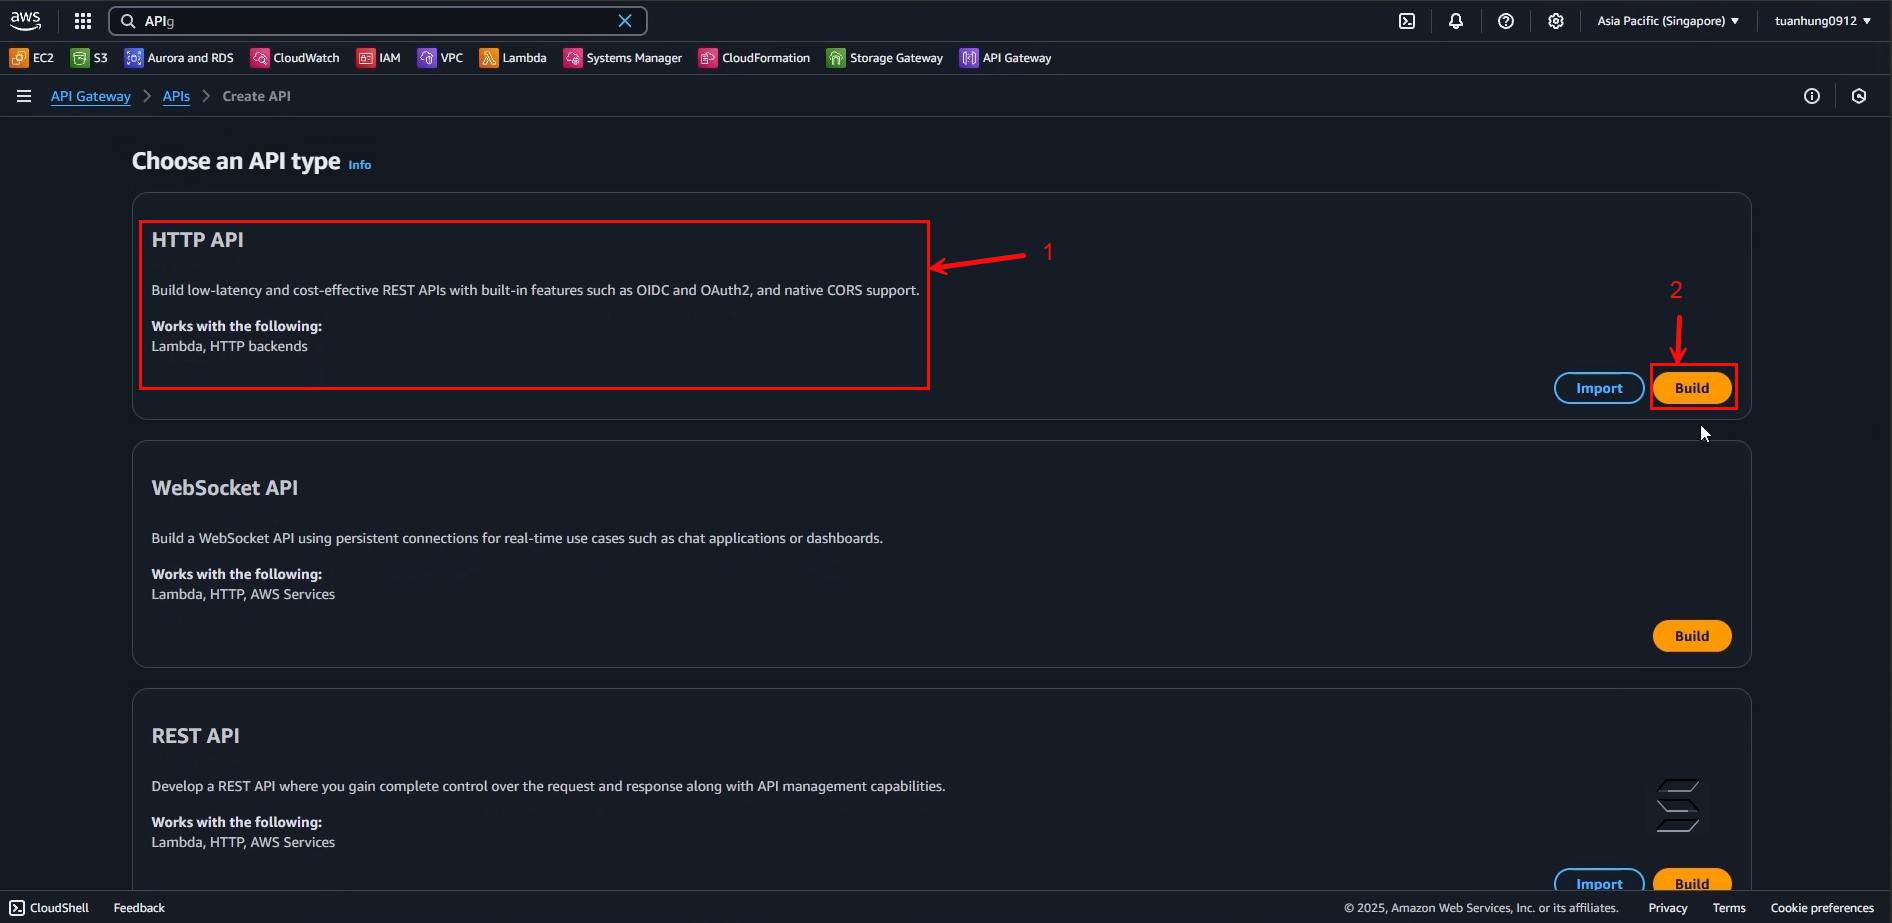
- On the page to add a new API, you can see many types of APIs for different purposes such as: HTTP API, WebSocket API, REST API, etc.
- In this section, we will use HTTP API
In the Choose an API type: section:
- Select HTTP API
- Click the Build button
- The result is as shown below:
- Next, after performing the previous step, you will be taken to the API configuration page consisting of 4 steps: Configure API, Configure routes, Define Stages, Review and Create.
- Here, you will configure the API according to these 4 steps to Build an API Gateway
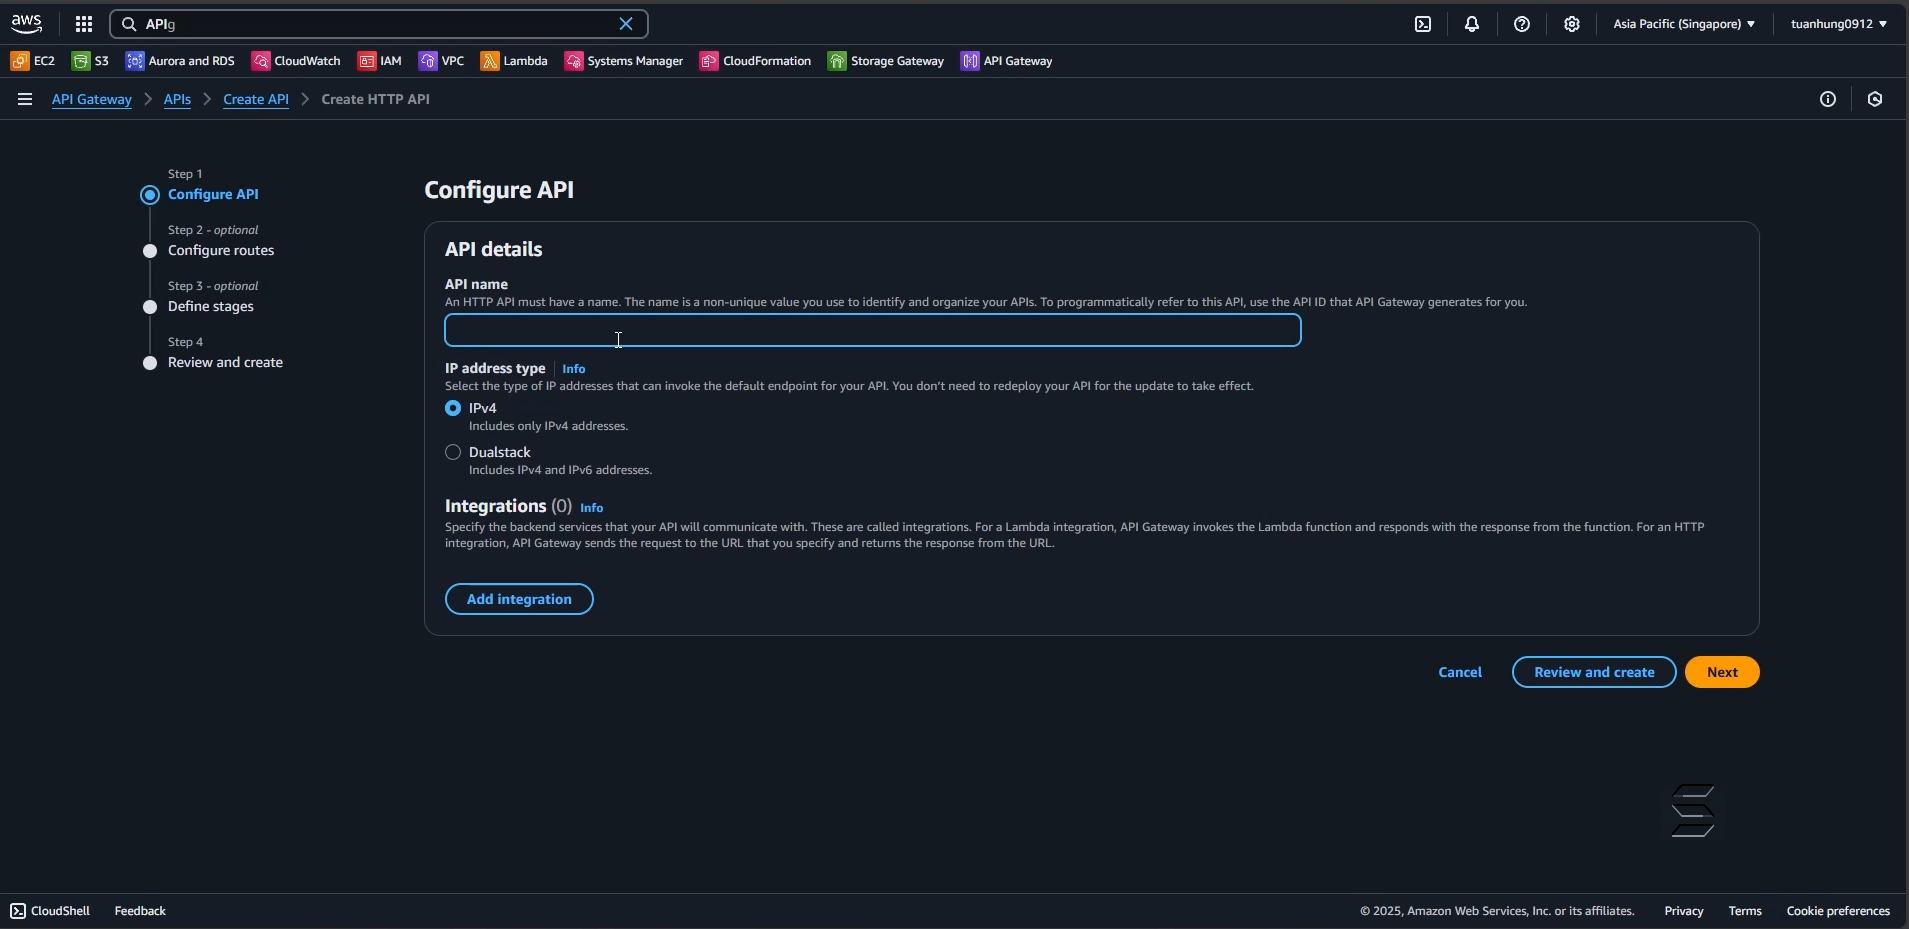
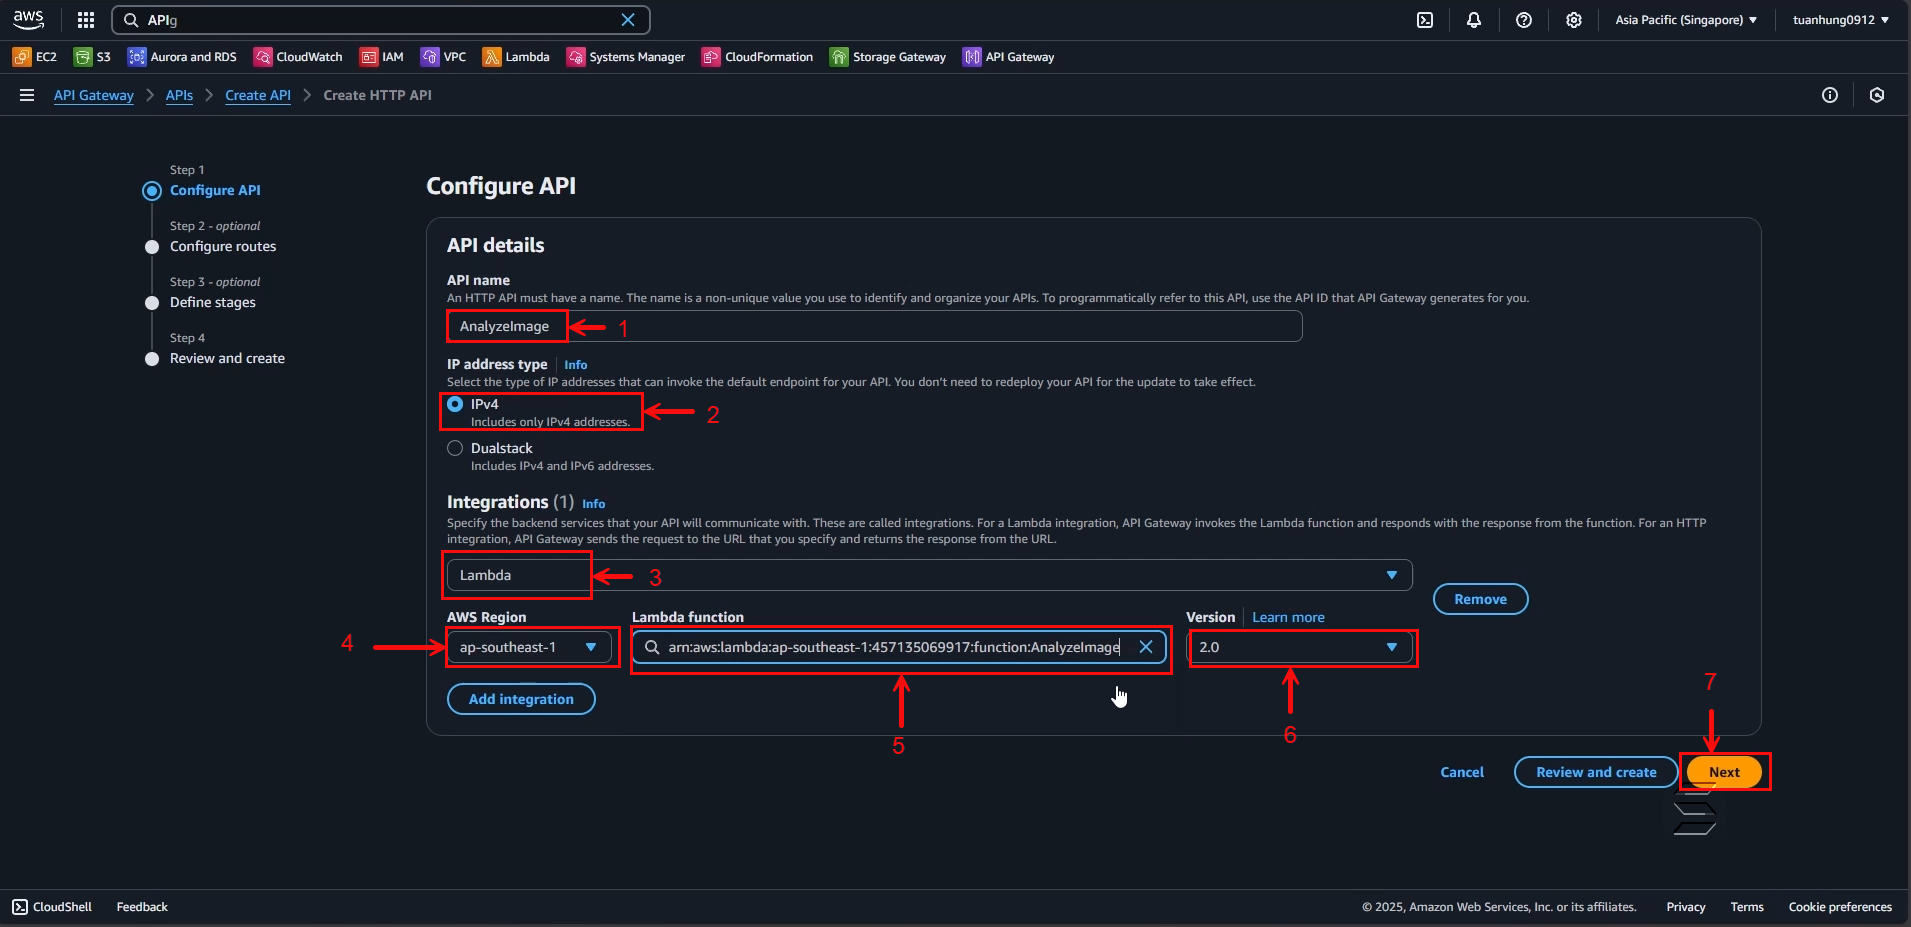
In the Configure API: section:
- API name: enter a name for the API. For example: AnalyzeImage
- IP address type: select IPv4
In the Integration: section:
- Here is where you will connect one of the services to the API
- Select Add Integration
- Choose the Lambda service
- AWS Region: select your current Region. For example, in this lab: ap-southeast-1
- Lambda function: select the function created in the previous section, here we choose AnalyzeImage
- Version: select 2.0
- After configuring the above steps, click the Next button
- Next, you will be taken to Step 2: Configure routes
- On this page, you will configure the API to perform the image analysis function using the path and one of the API methods as shown below:
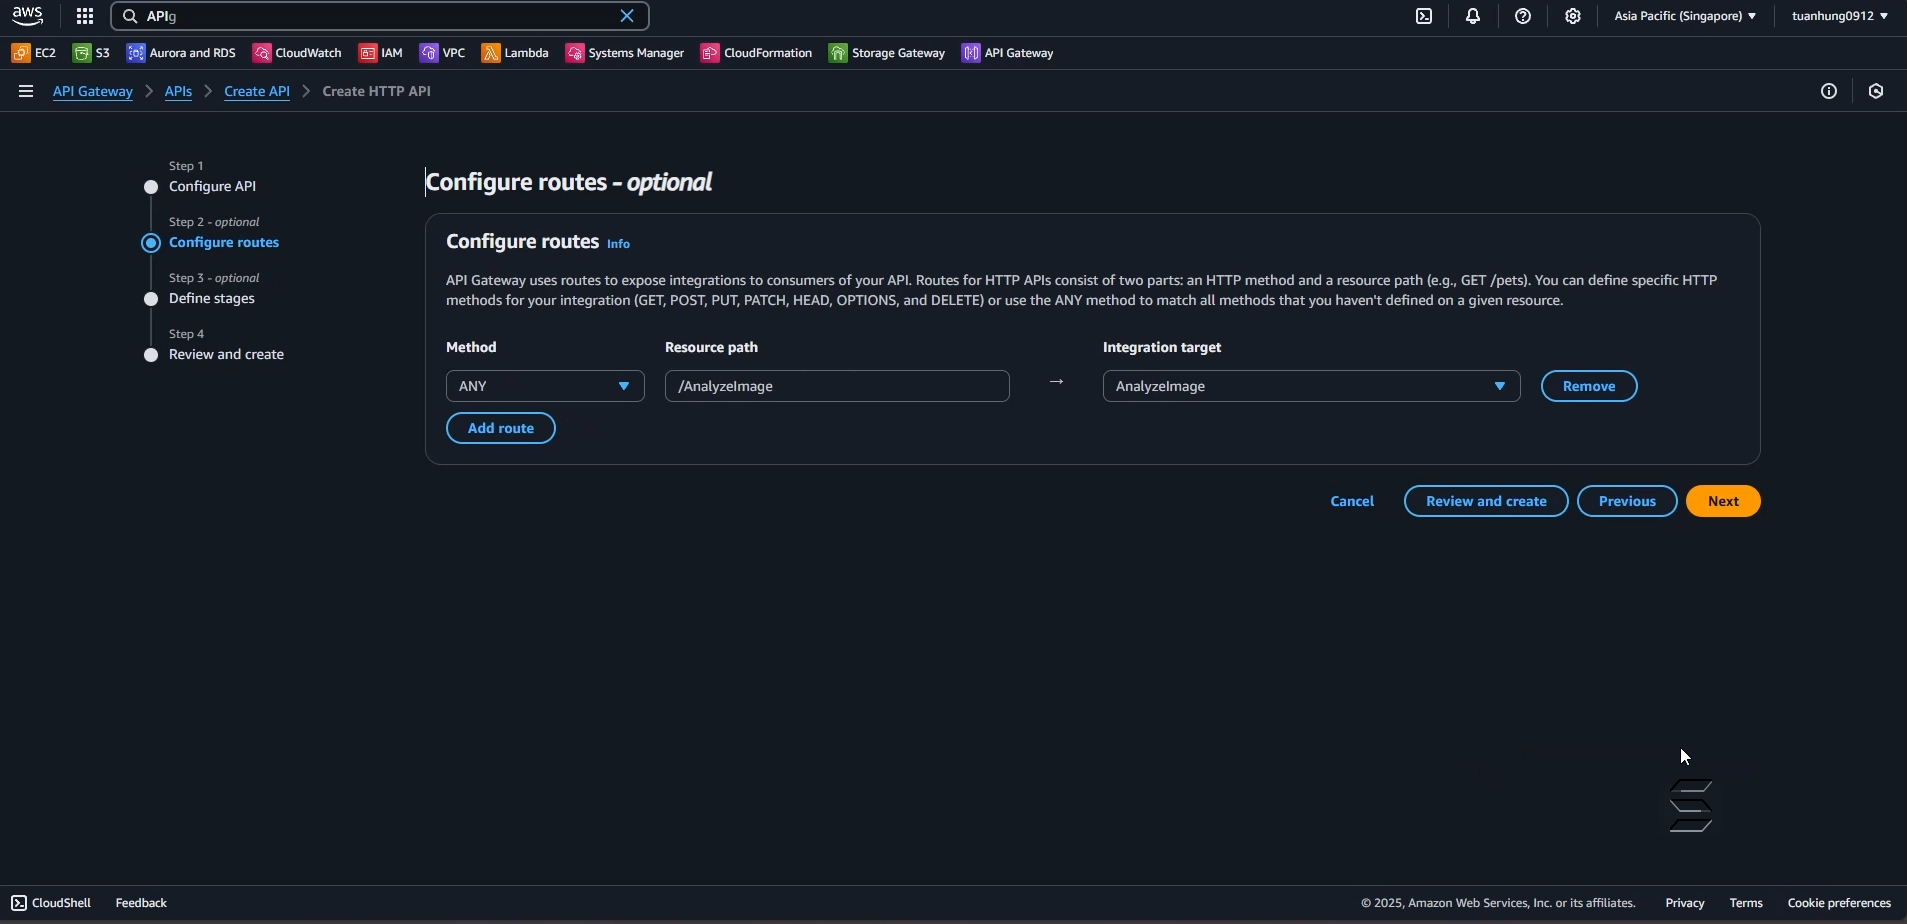
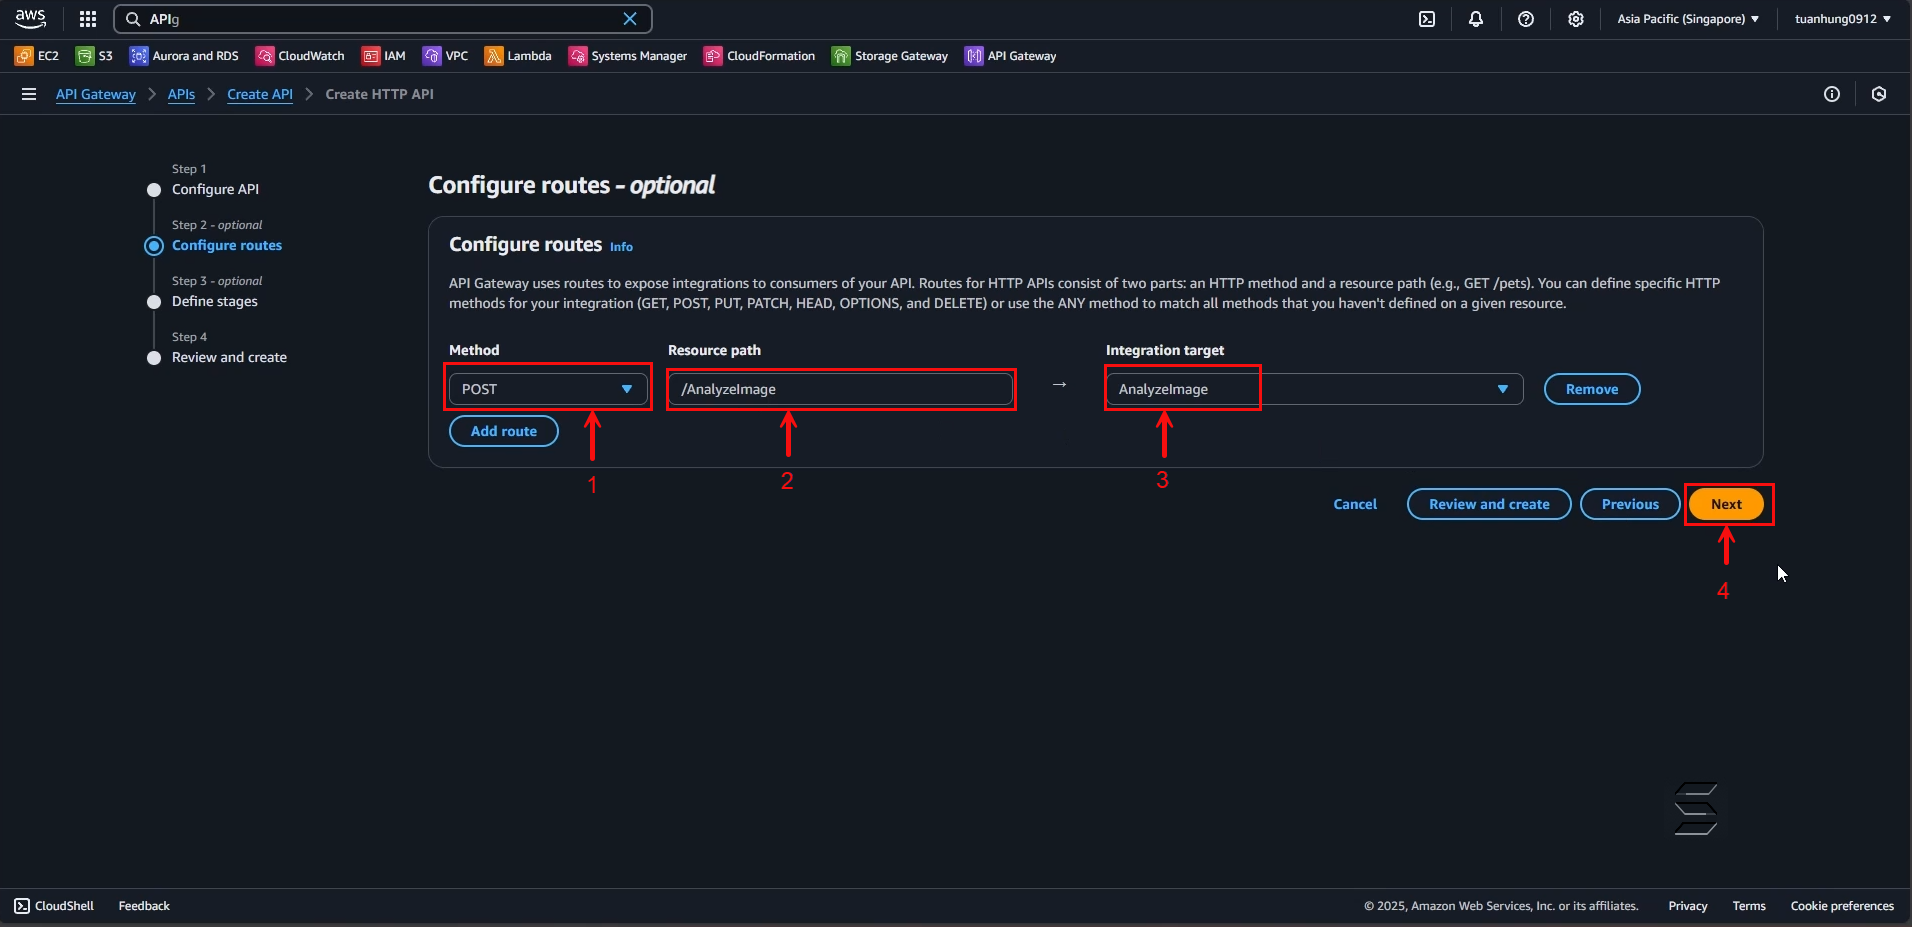
In the Configure routes: section:
- Method: select POST
- Resource path: you can freely set the API path. For example: /AnalyzeImage
- Integration target: select AnalyzeImage
- After configuring the above steps, click the Next button
In Step 3: Define stages
- Leave the default values for Stages
- You can choose to Deploy the API manually or automatically whenever there are changes
- In this example, I will leave it as the default Auto-deploy
- After configuring the above steps, click the Next button

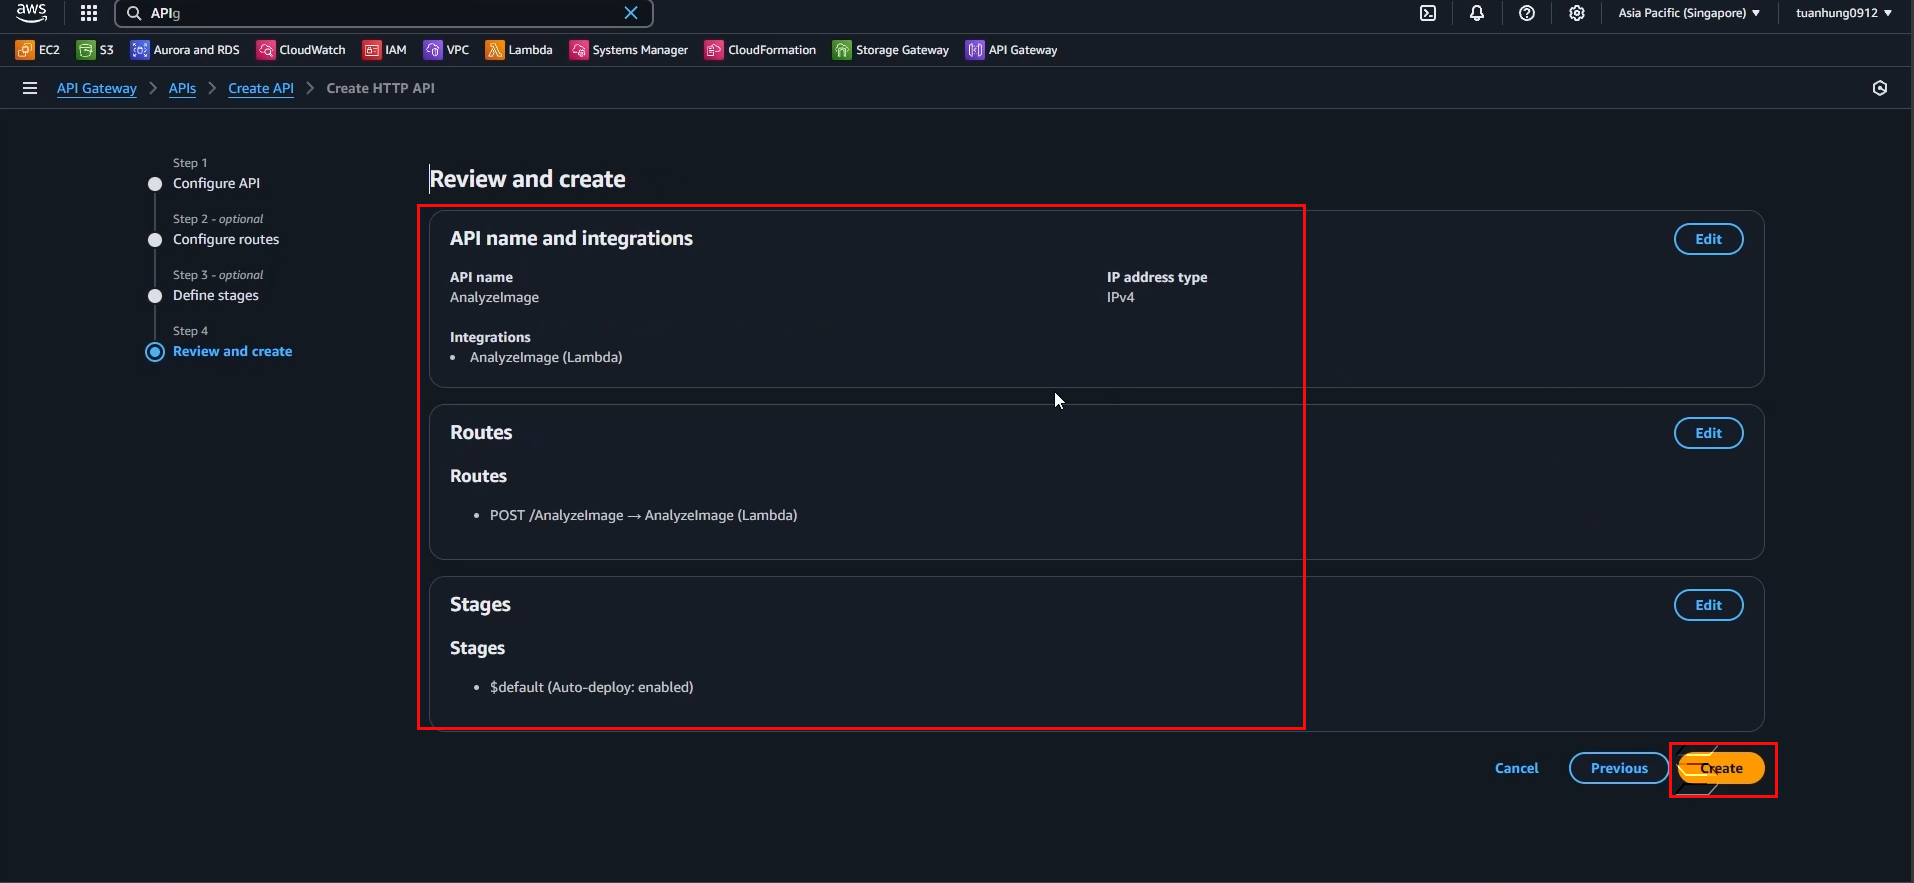
In Step 4: Review and create
- On this page, you will review all the configurations from the previous 3 steps
- If there are any mistakes, you can click the Edit button in each section
- After checking all the API configurations, click Create to create the API
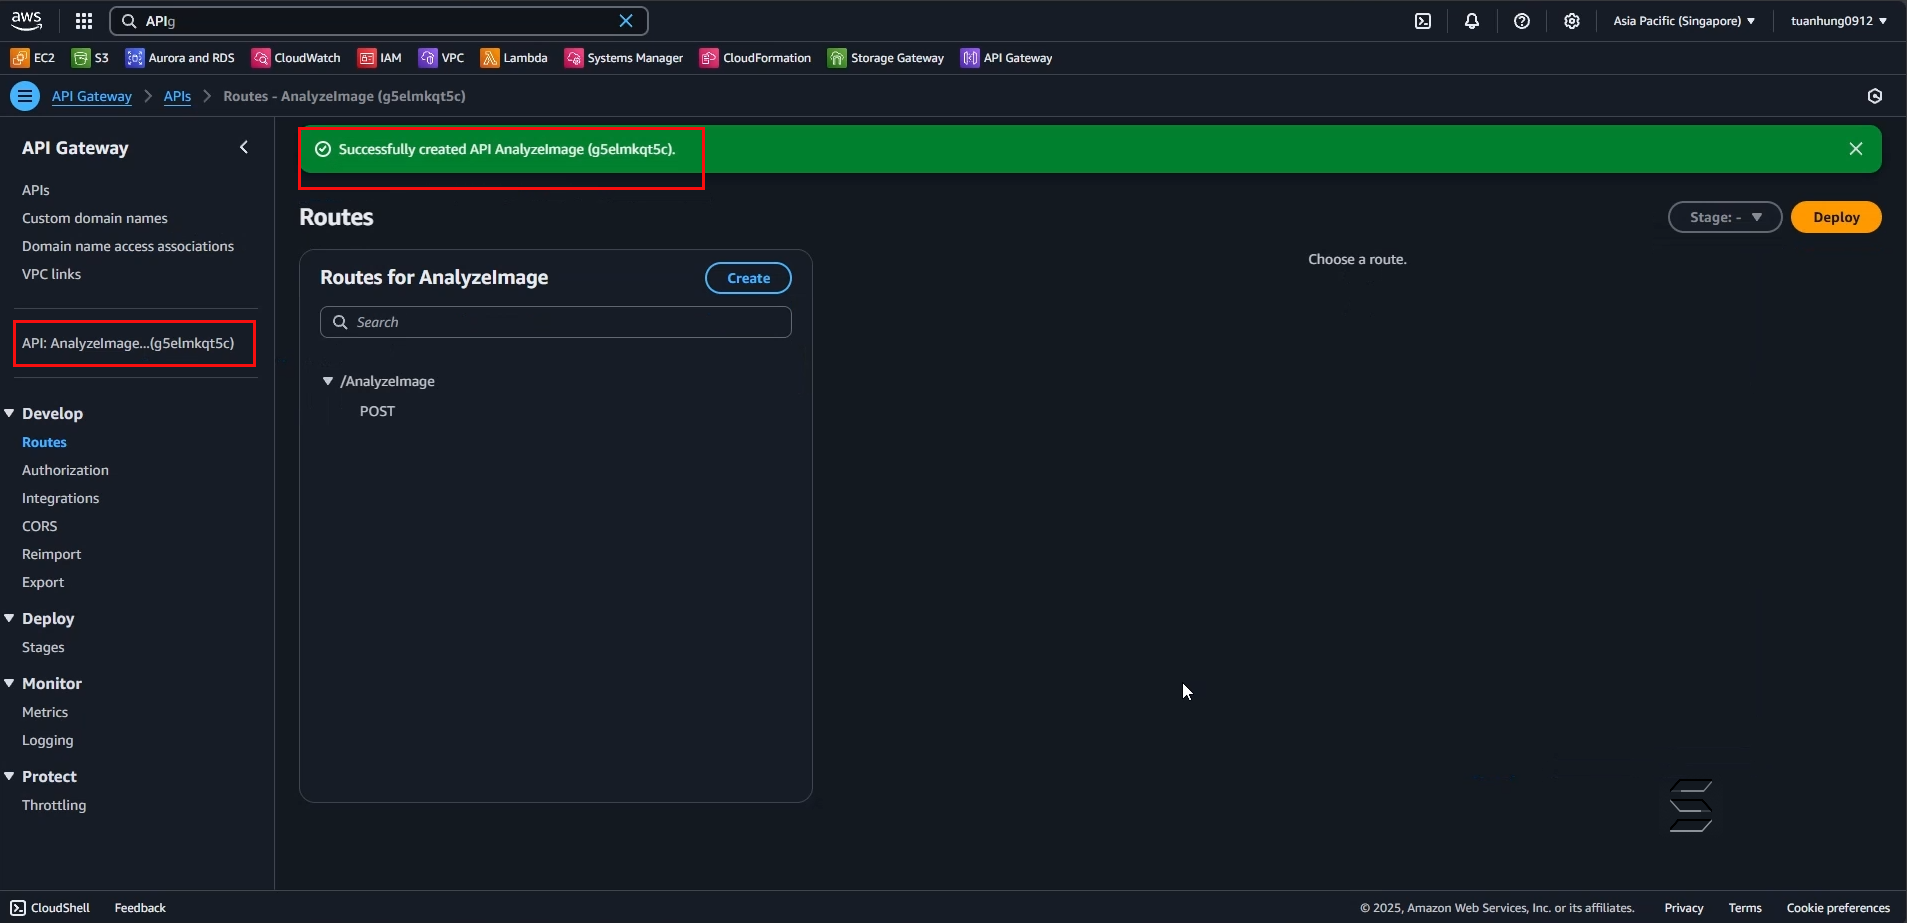
- Wait a moment, the system will successfully create your API and return a success notification as shown below:
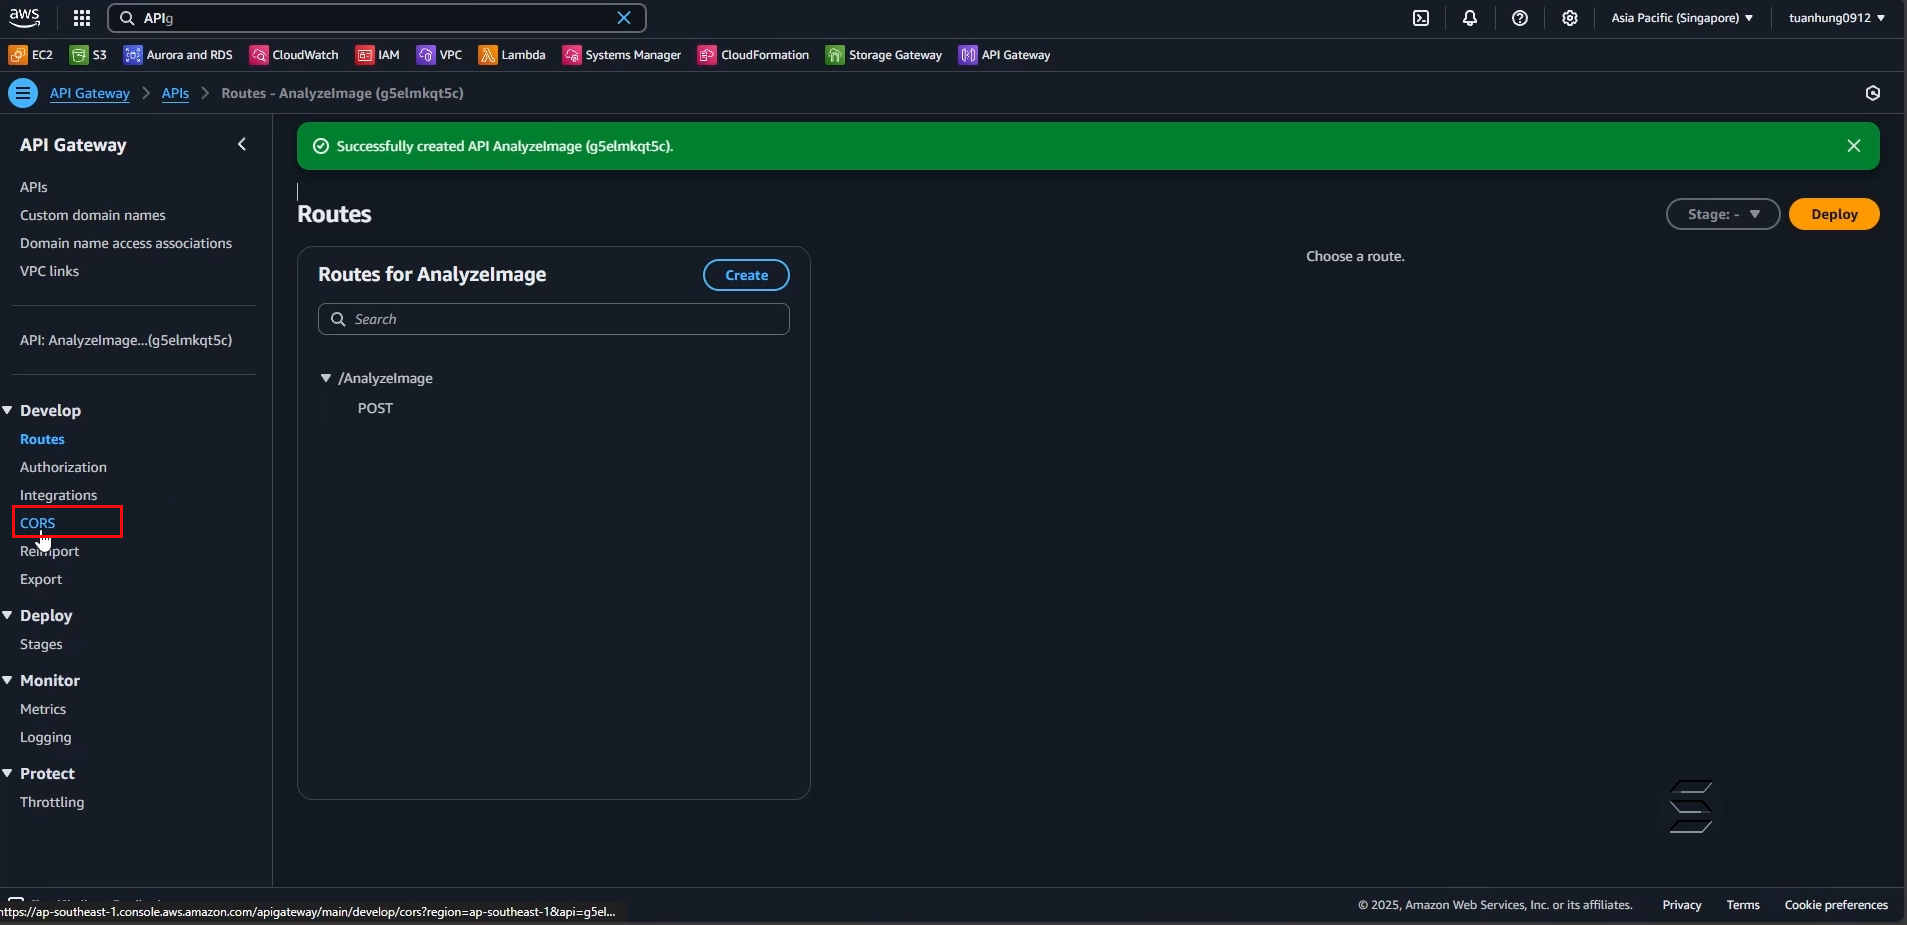
3. Configure CORS for the API to communicate with the Front-End and read JSON data
- On the right side of the Navigation Panel, in the Develop section, select CORS as shown below:
- On the CORS page, you can see the configurable parts of CORS including: Access-Control-Allow-Origin, Access-Control-Allow-Headers, Access-Control-Allow-Methods, Access-Control-Expose-Headers, Access-Control-Max-Age, Access-Control-Allow-Credentials.
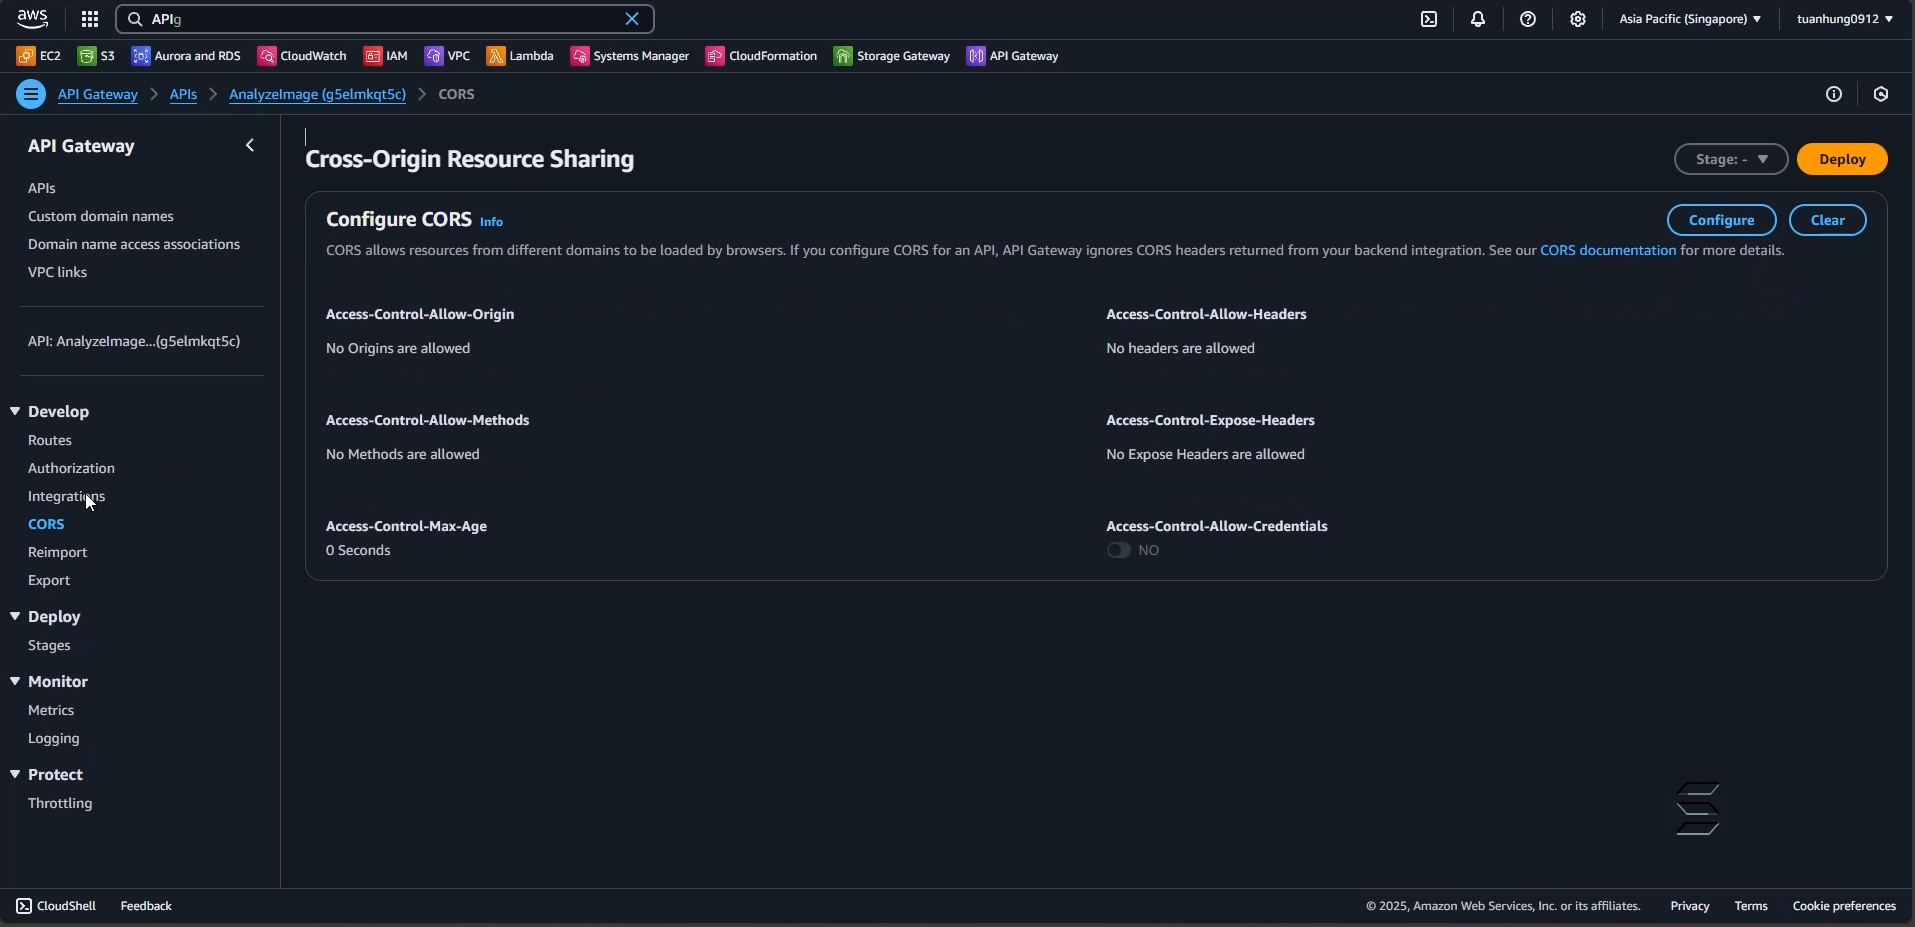
In the Configure CORS: section:
- Click the button in the top right corner: Configure
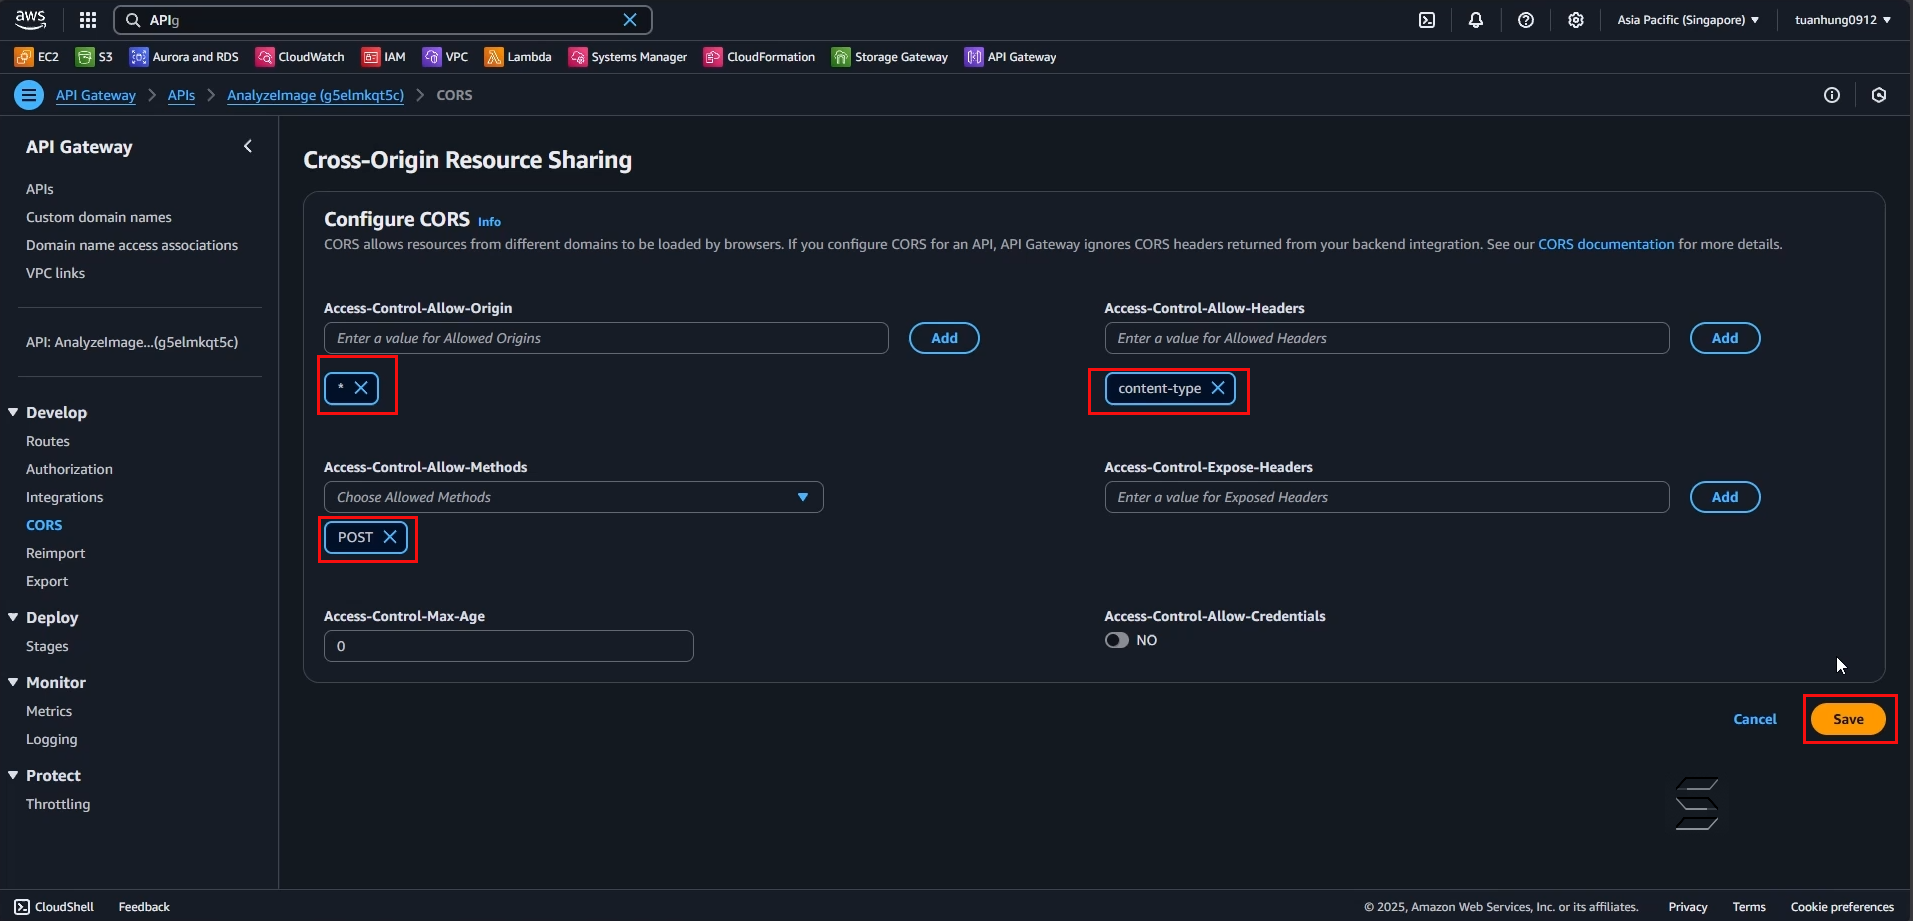
- Access-Control-Allow-Origin: enter (*) to allow all domains to access, or you can specify the exact domain you want the API to communicate with
- Access-Control-Allow-Headers: enter content-type to allow reading input in JSON format
- Access-Control-Allow-Methods: select POST to match the routes configured earlier
- Leave the remaining CORS settings as default
- After configuring all the above steps, click the Save button
Note, this is a required configuration step. If you skip this step, the API will not be able to communicate with the Front-End.
You have completed the API configuration for the image analysis function using AWS Rekognition